
The wilulu
A radio dimmer in your hand
How to dim wireless :
- a LED ?
- a LED strip ?
- a LED COB ?
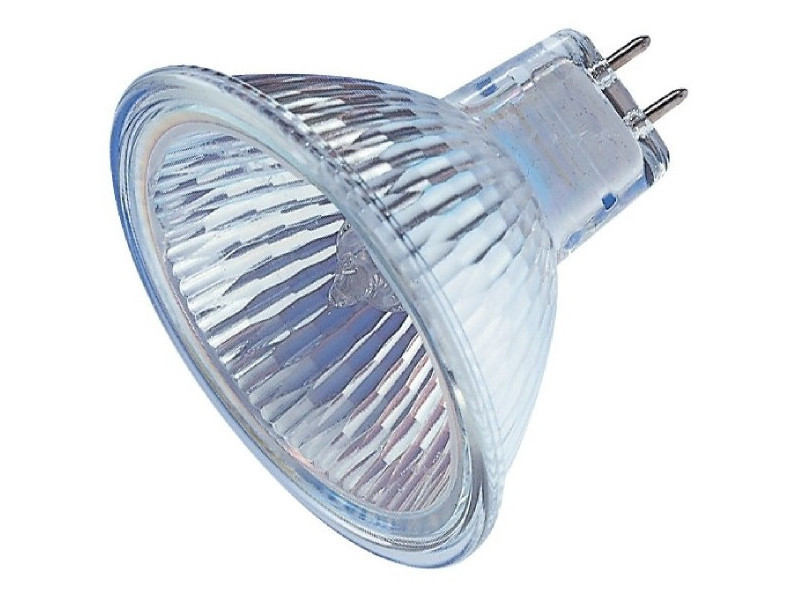
- a 12V bulb ?
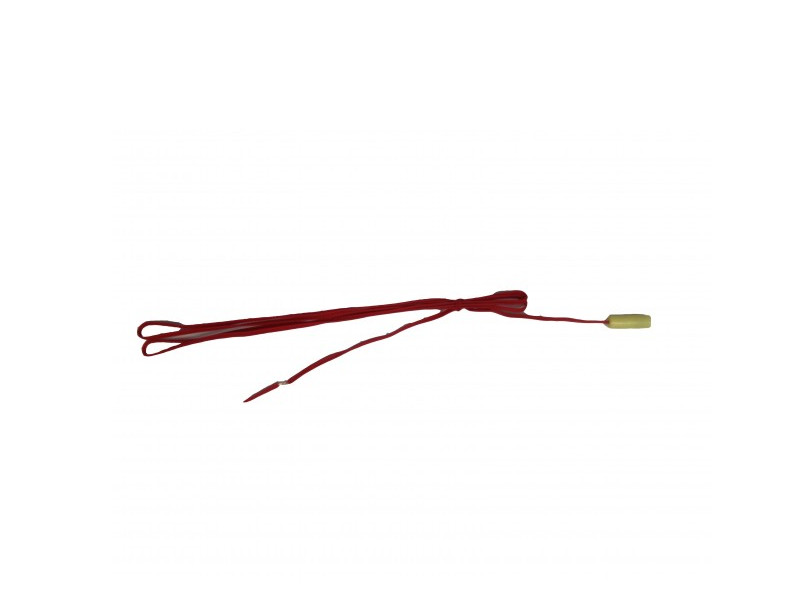
- an igniter ?
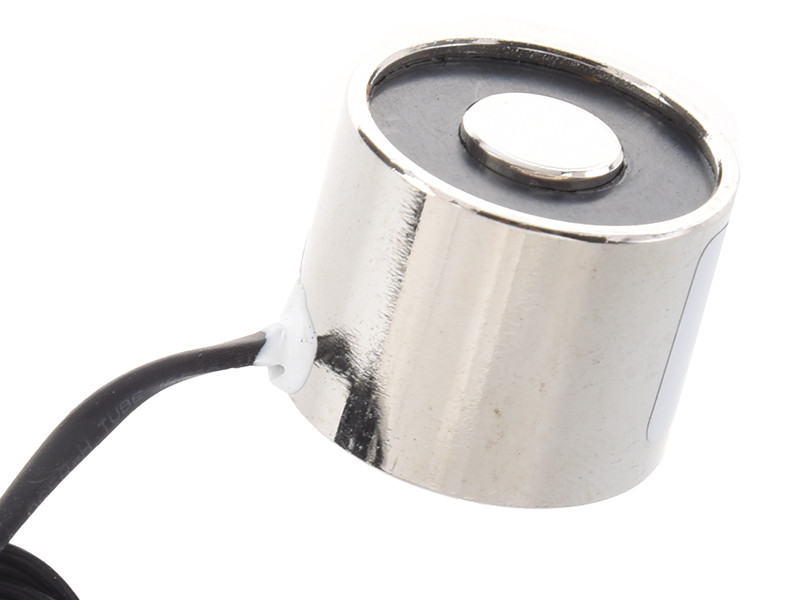
- an electro magnet ?
But first: What is a wilulu?
A wilulu is nothing other than a dimmer.
- A wireless dimmer
- A miniature dimmer
- A DC current dimmer
- A low voltage dimmer (1 to 48V DC)
- A dimmer that dims by the ground
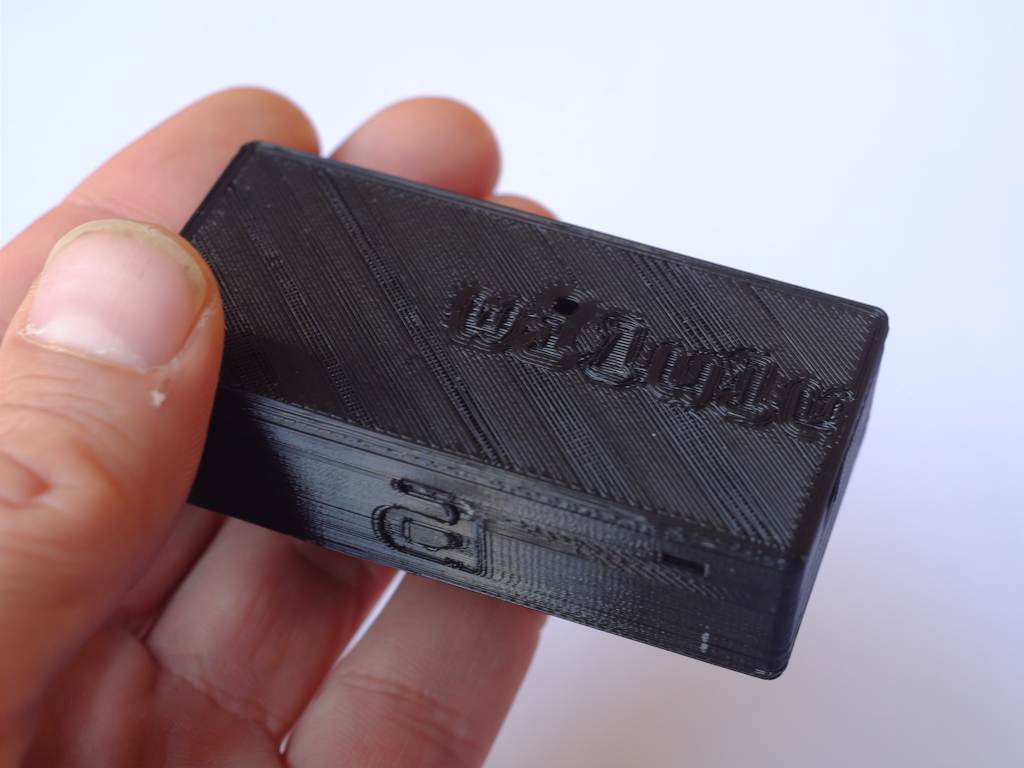
A dimmer that holds in the hand
In this tutorial we will study:
- What is a wilulu made of ?
- dimming by the ground
- Maximum voltage and current
- How to choose between the 3 ways possible to wire the wilulu ?
- Calculation of the power resistor.
- How to control the wilulu ?
- Addressing a wilulu.
- Program a wilulu.
- How to change the frequency of a wilulu ?
- Different boxes for wilulu.
- How to choose batteries ?
- Antenna.
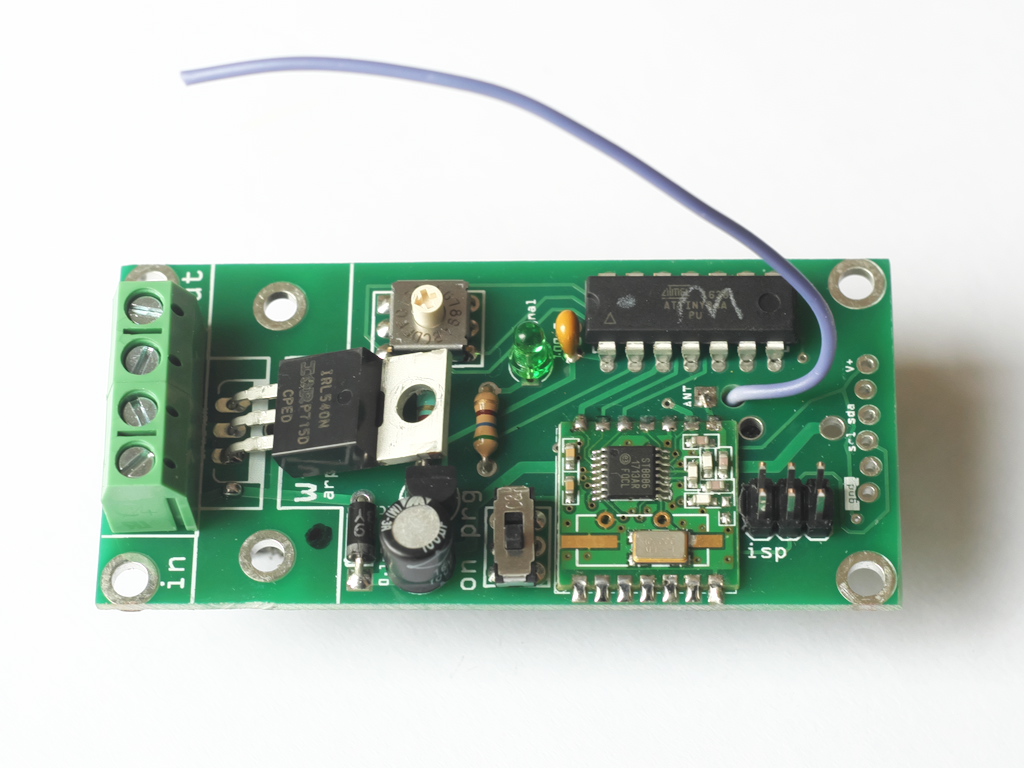
1.What is a wilulu made of ?
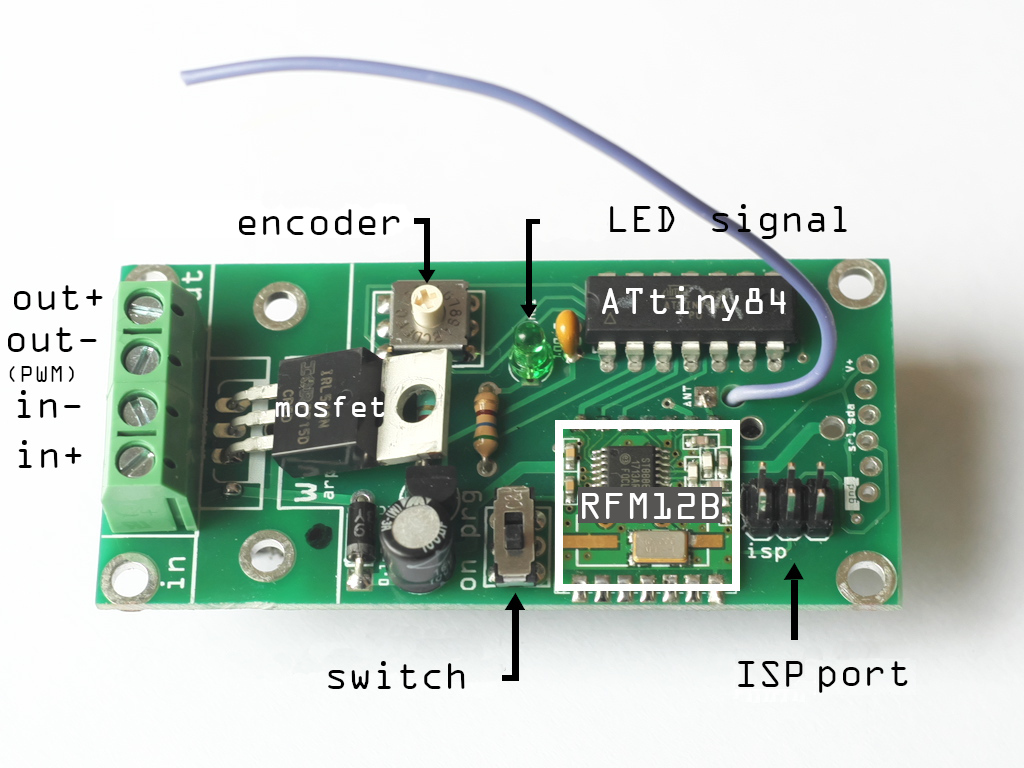
- in+/in- : Through these terminals we supply the wilulu with voltage between 3 and 12V
- out- : output ground, dimmed in PWM. To connect to the ground of your led, lamp or other ...
- out+: direct supply
- Mosfet: dimme up to 2,5 A or 8A with a heat sink.
- Encoder: Assign your wilulu (fast addressing on 16 positions)
- Led signal: signals radio reception.
- ATtiny 84: Microcontroler.
- ISP Port: port of programming, change the code, the frequency ...
- Switch: Choose between ON mode and programming mode.
- RFM12B: the radio receiver.
2.why dimming by the ground ?
The arpschuino boards are dimed in PWM by the ground. This is the basis of arpschuino, the wilulu does not depart from this rule.
Thanks to this principle, the same board can control multiples elements operating under different voltages.
3.Maximum voltage and current :
The wilulu can manage voltages up to 48v. On the other hand, the electronics of the board must be supply by a voltage between 3 and 12V.
Voltage between 3 and 12v, one power supply.
Voltage greater than 12v, 2 power supplies :
one for the wilulu
another one for your device, LED or other.
Maximum current (ampere) :
2,5 amperes
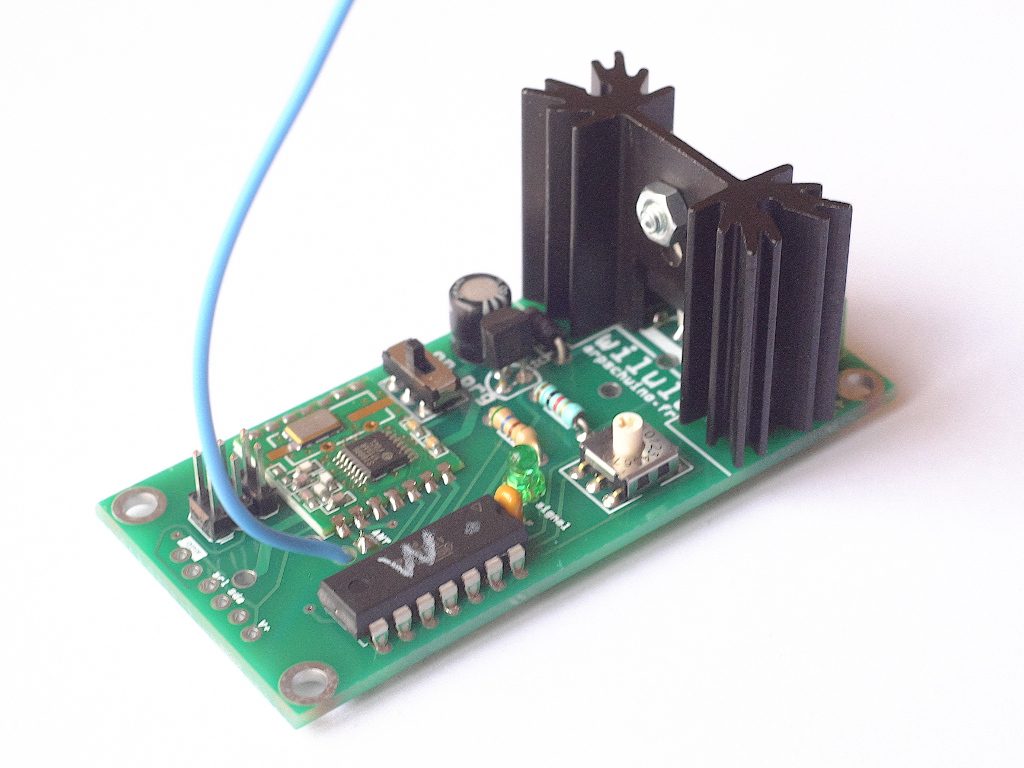
up to 8 amperes with a heat sink
4.How to choose between the 3 montages possible for the wilulu?
Mounting 1: a power supply between 3 and 12V:
Suitable for ignitor (9v) LED strips 12V, lamps 6 or 12V, motors, electromagnets ...
In this configuration, the jumper must be closed by a soldering point and a jumper is installed between in + and in-.

fireworks inflamator controlled by wilulu
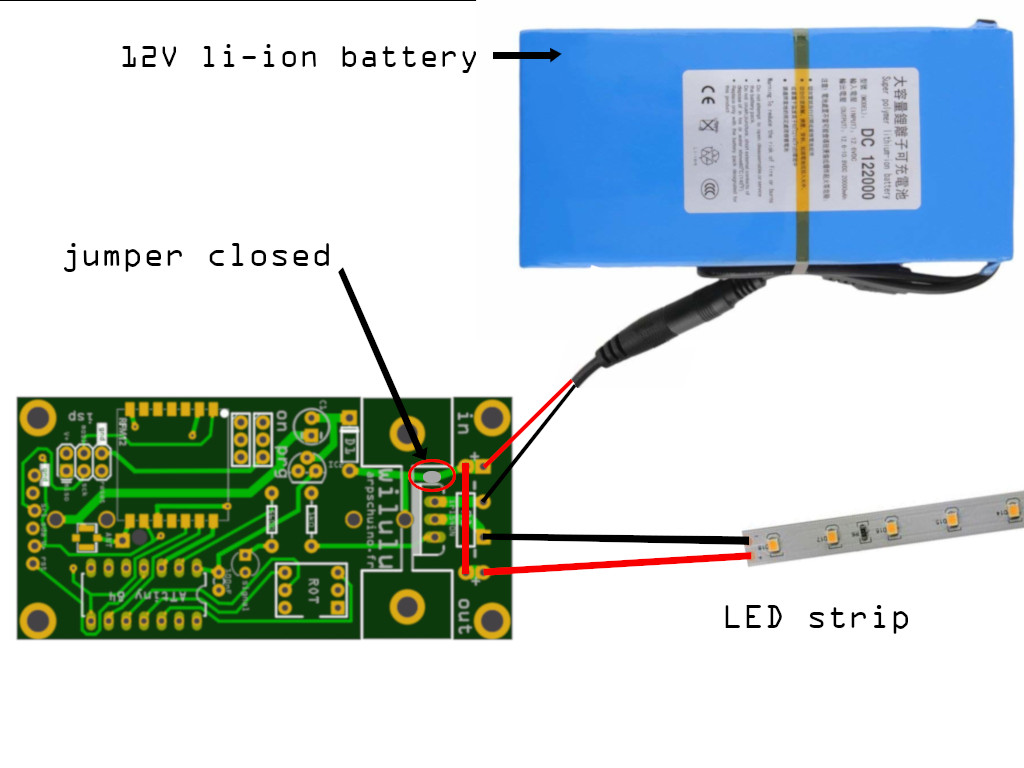
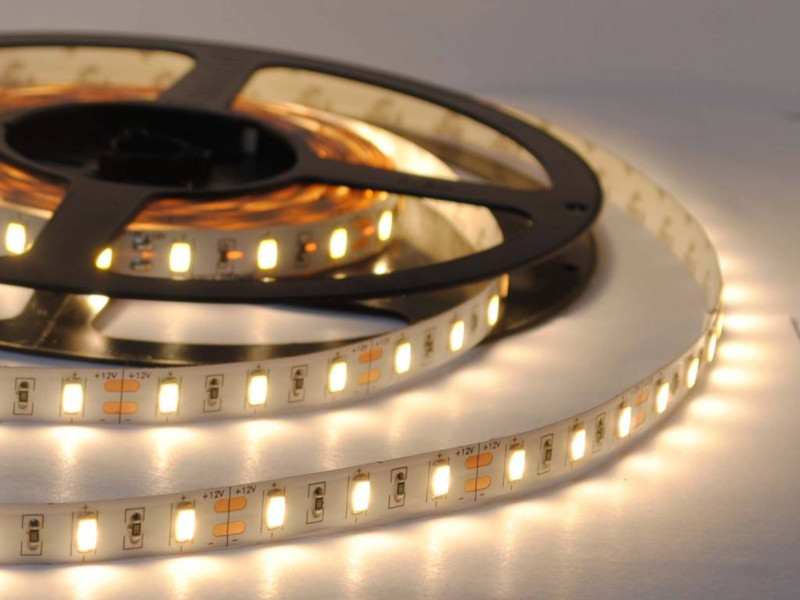
LED strip controlled by wilulu
Mounting 2 : a power supply between 3 and 12V and current limiting resitor
LEDs need a current limiting resistor. You can solder it directly to the PCB of the wilulu.
See the next chapter how to choose it.
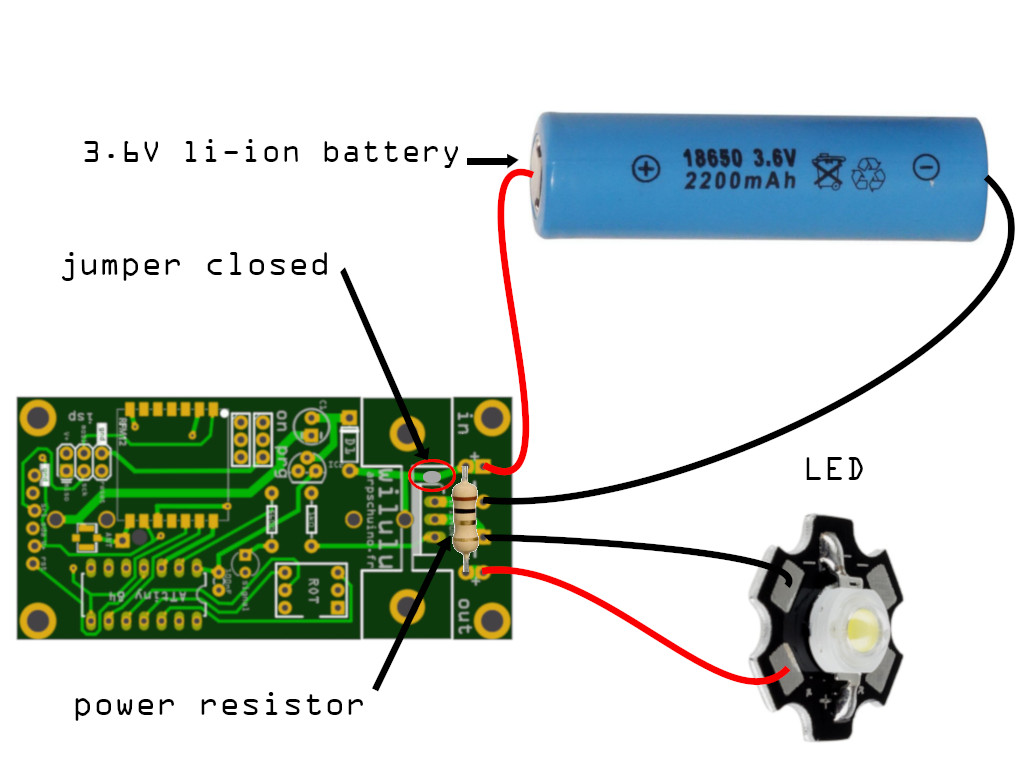
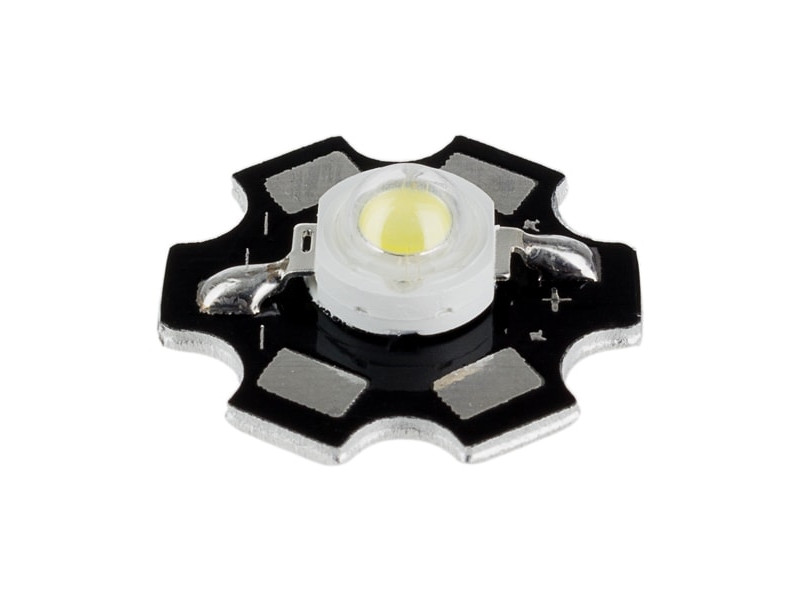
star LED controlled by wilulu
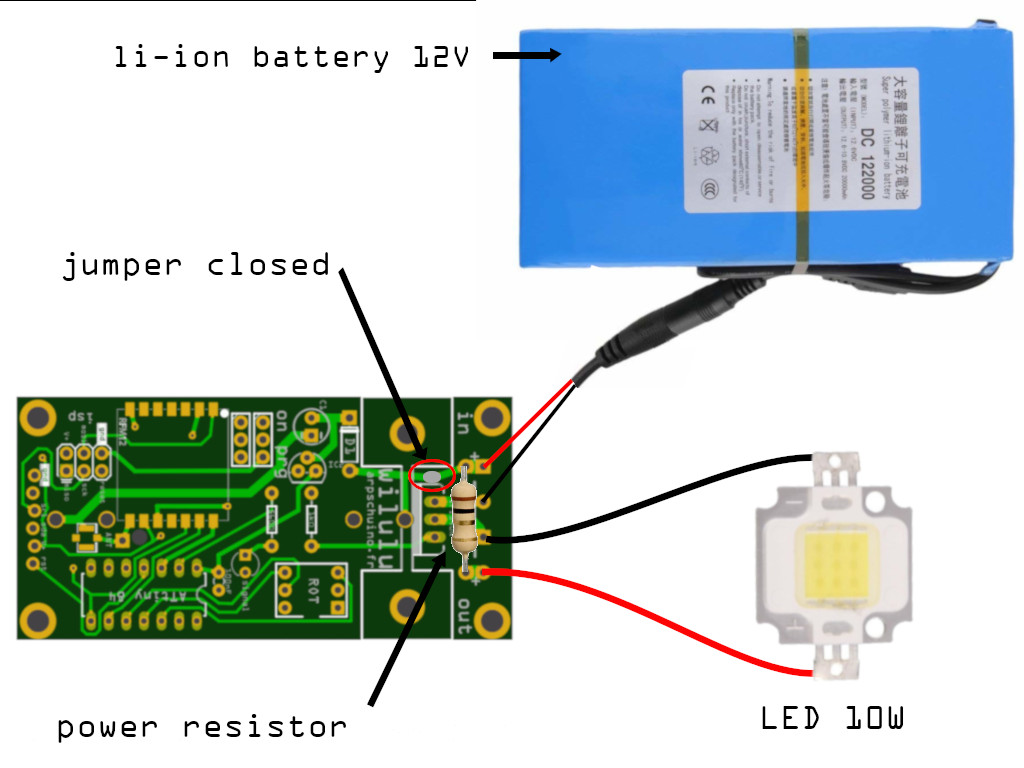
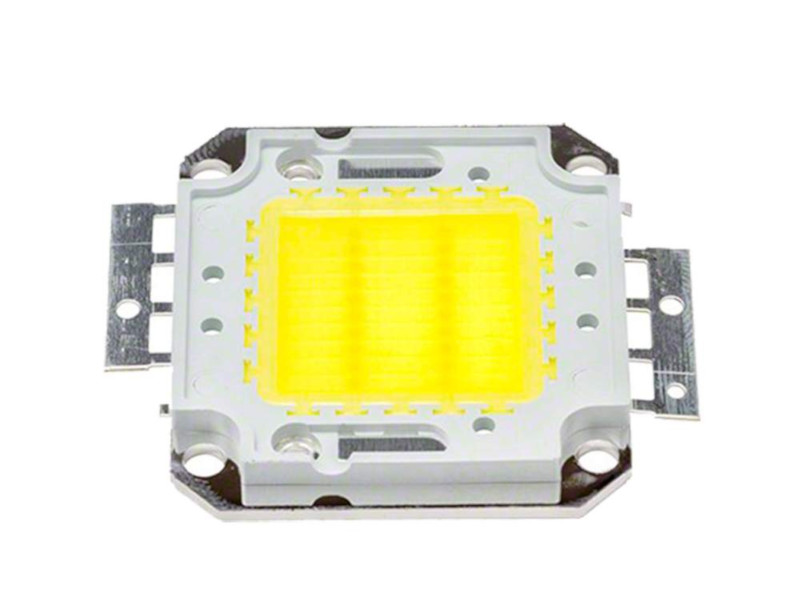
10w COB LED controlled by wilulu
Li-ion 14500 battery holders can be soldered directly on the wilulu :
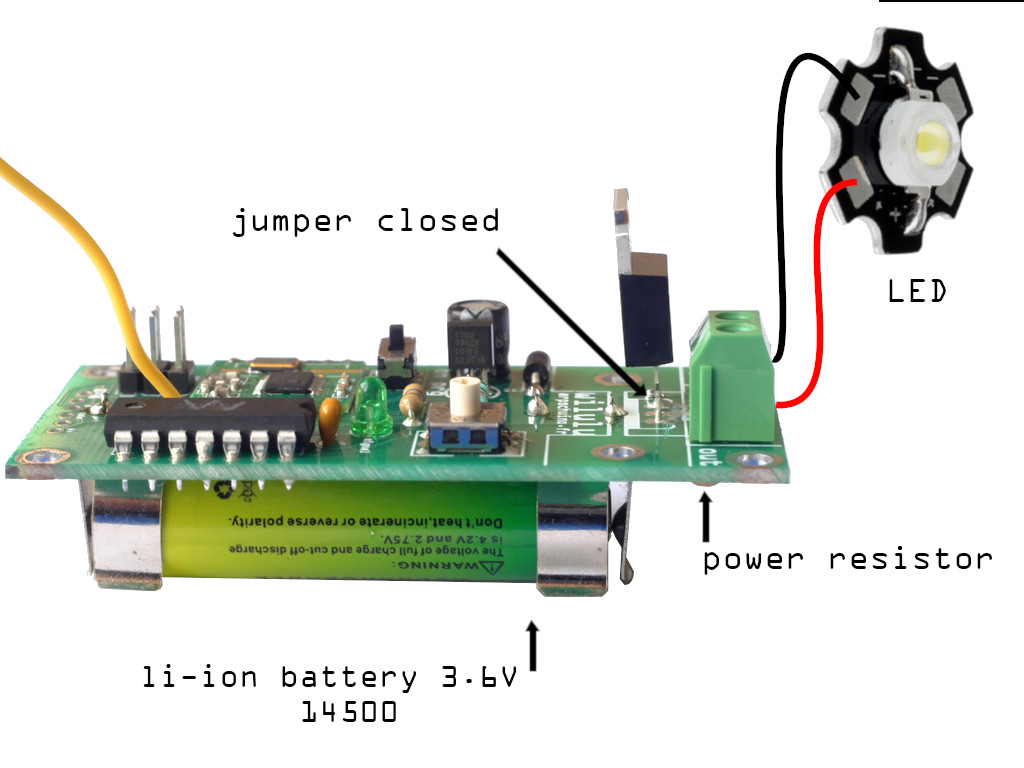
star LED controlled by wilulu with 14500 holders
Mounting 3 : 2 power supply, voltage greater than 12V
A COB LED, a 24v LED strip or a 24v electromagnet require a different power source than the wilulu electronics.
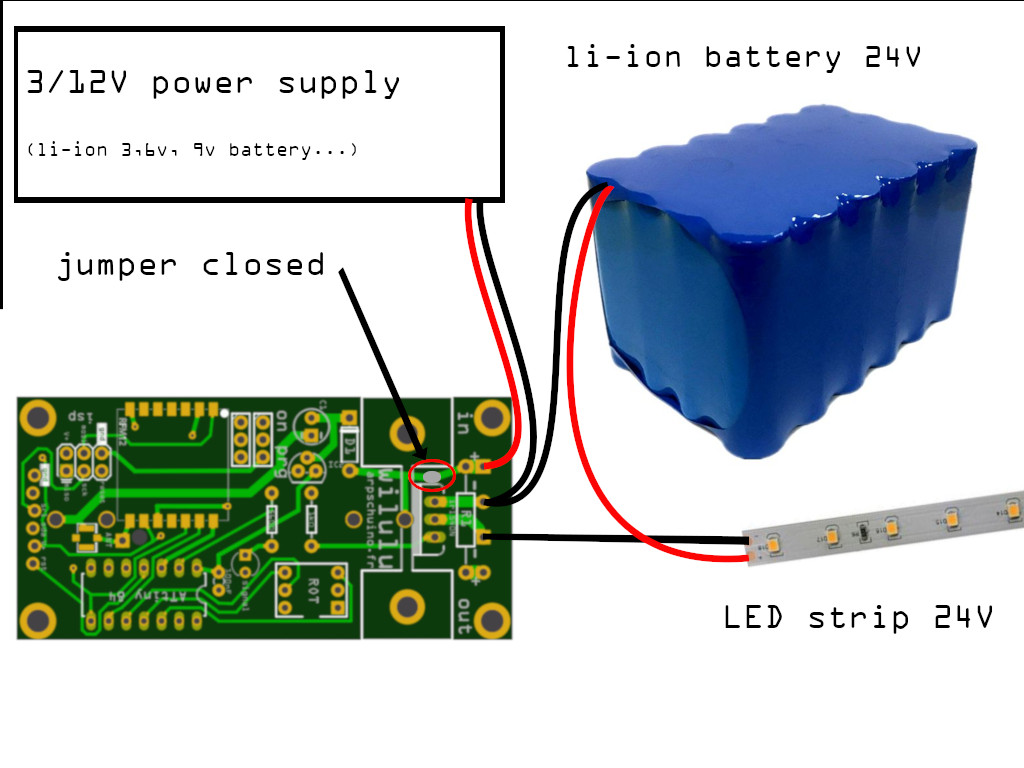
24v ledstrip controlled by wilulu
No more using a resistor in series with a LED 100W (32V, 3A), we will rather use current and voltage regulation devices like this one.
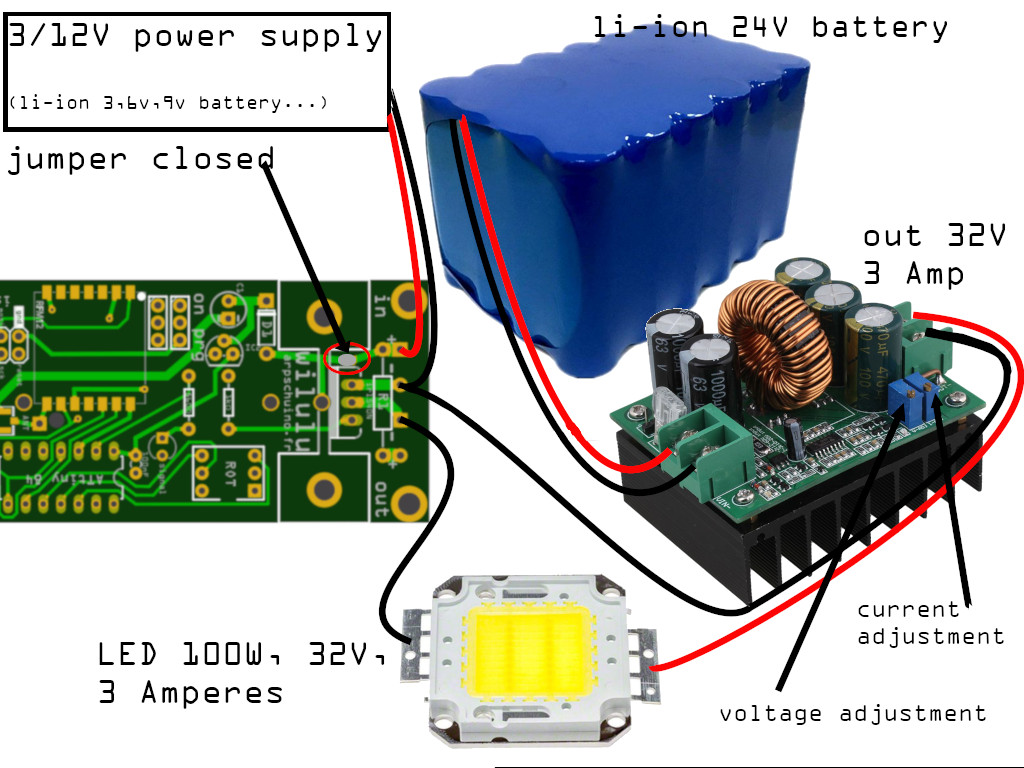
100W LED controlled by wilulu
5.power resistor calculation :
These two formulas will allow you to calculate its resistance (in ohm) and its power (in watt):

More detailed explanations are available here.
There is also severals online calculator like this one, and some smartphone applications.
Example with a 3W LED and a li-ion battery :
For this LED 3W we have :
For this li-ion batterie :
When the values can change the calculation "cautious" (for the LED),is to use the largest supply voltage.
Calculation of resistance :
R= ( V alim-V led ) / I
= ( 4,2-3,15 ) / 1
= 1,05 ohm
In practice we take a resistance to the standard value of 1.2 ohmn.
Calculation of the power of the resistance :
P= ( V alim-V led )² / R
= ( 4,2-3,15 )² / 1,2
= 0,92 watt
So a resistor of 1.2 ohm, 2W will guarantee that the assembly does not heat up.
With a calculation "a little less careful", we would put a 1ohm resistance. Concretely it works, the LED shines a little harder but it heats up more and will certainly have a shorter life. Up to you...
Here is a table to give you an idea of the resistances used according to the LEDs used. It is provided as an indication and should not prevent you from calculating the appropriate values for your assembly.
LED | Batterie | Résistor | |||||||
LED type | power | max forward voltage | current | references | type | nominal voltage | max voltage | resistance | power |
Star LED | 1W | 3.3 V | 300 mA | Li-ion | 3,6~3,7V | 4,2V | 3.3 ohm | 1/4 ou 1/2W | |
Star LED | 3W | 3 .15 V | 1 A | Li-ion | 3,6~3,7V | 4,2V | 1.2 ohm | 1 ou 2W | |
Star LED | 5W | 2.85 V | 1.5 A | Li-ion | 3,6~3,7V | 4,2V | 1 ohm | 2 ou 3W | |
Star LED | 10W | 2.82 V | 3.15 A (heatsink recommended) | Li-ion | 3,6~3,7V | 4,2V | 0.47 ohm | 5W | |
Star LED | 13W | 11.9V | 1.05 | pack li-ion | 11.1V | 12.6 | 0.68 ohm | 1W | |
LED COB | 10W | 12V | 900mA | pack li-ion | 11.1V | 12.6 | 1 ohm | 1W | |
LED COB | 30W | 34V | 1.05 A | 3 X pack 12V | 33.3V | 37.8V | 3.9 ohm | 5W | |
LED COB | 50W | 34V | 1.5 A | 3 X pack 12V | 33.3V | 37.8V | 2,7 ohm | 7W (not recommended*) | |
LED COB | 100W | 34V | 3 A | Use of a current regulation system* | |||||